
User Segments
Segments are used to draw upon the results of one or more individual filters.
This article provides an overview of segments, their relationship with filters, and walks through the creation of an example segment.
User Segments
User Segments are constructed from one or more filters.
If a segment has only one filter assigned to it, all of the users from that filter will be displayed in the segment. If a segment has several filters assigned to it, users will be taken from all filters. In this latter example, duplicate users that appear in more than one filter, will only show once.
The separation of filters and segments allows you to create a wide selection of generic filters, a few of which you can apply to each segment, allowing you to centrally manage and update the criteria used to search for users. For example, you could create filters that respectively search for:
- Loyal users
- High spending users
- Recently active users
- Users in London
You could then combine different combinations of these filters for each segment. If, at a later point in time, you decide to change how you define "loyal" customers, you can then change only one filter, which will automatically update any segments that use the Loyal users filter.
The use of user segments in the front-end of your store is discussed in more detail in the User Segments Front-End Guide.
Managing Segments
User Segments can be found by navigating to Users > User Segments > Segments. Here, you'll be presented with a list of all segments that exist on your store.

Segments are managed like other items in Aurora:
Item | Description |
|---|---|
Name | Holds the name of the user segment. |
Description | Contains an internal description for the segment. |
Last Generated | Shows the date and time that the user segment was last generated. |
Created | Displays the date and time that the segment was created. |
Modified | Displays the date and time that the segment was last modified. |
CSV | Indicates if a CSV file has been generated for the respective segment. |
Generated | Provides the generation status of a segment: |
Status | Use the status icon to enable or disable a user segment. If a user segment is disabled, it will not be used to display content on your store. |
Edit | Edits the user segment. |
Delete | Deletes the user segment. |
Add Segment | Creates a new user segment. |
User Segment Generation
Once a segment has been created, before it can be used, it needs to be generated. On save, a new segment is placed into the queue to be generated. Depending on the complexity of the filters used, and the number of users in your database, this could take several minutes.
The generation status of each segment is shown on the Users > User Segments > Segments page, in the Generated column. A red clock icon indicates that a segment is yet to be generated, or has started generation but is yet to finish. A green icon indicates that the segment has beed generated and is ready for use.
Any new users, or changes to existing users, will not be reflected in a segment until it regenerates. The update frequency, specified for each segment, will determine how often a user segment is regenerated. The available options are once every:
- 15 minutes
- 30 minutes
- 1 hour
- 2 hours
- 1 day
- 1 week
Where the intended use of a segment permits it, we would recommend that you use lower update frequencies.
This will limit the potential impact on your server, compared to generating numerous complex segments every 15 minutes.
Creating and Editing Segments
User segments can be added using the Add Segment button on the Users > User Segments > Segments page, you'll then be taken to the Add Segment page. Existing segments can be edited by selecting the Edit icon on the Users > User Segments > Segments page for the respective segment.
1. Check the Active checkbox to enable a User Segment as soon as it is saved.
Don't forget, once a segment has been saved and activated, it still needs to be generated.
2. Enter a Segment Name into the second field. This has to be a unique value, that will be used by your digital agency to call the segment.
3. Provide an Internal Description that can be used to provide more information about the segments intended use.
4. Select an Update Frequency from the drop down menu.

Before your segment can be saved, at least one filter needs to be added.
Adding Filters to a Segment
1. To add filters to a segment, when editing or adding a segment, select the Add Filter button.
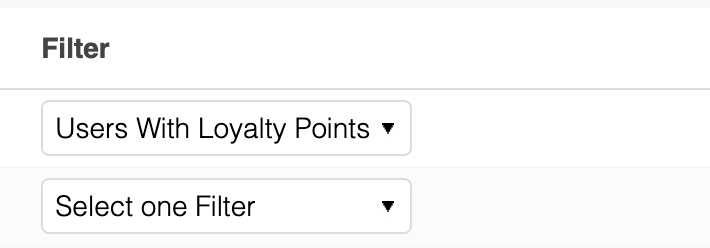
2. Using the drop down menu that has subsequently appeared, select the Filter that you would like to add to the segment.

3. Further filters can be added by clicking the Add Filter button for each additional filter required.
Feel free to use the Preview button to view the results of your segment. The result will always be dependent on the users registered to your store.
4. You can Save your segment using the Add/Edit Segment button at the bottom of the page.
To remove a filter from a segment, use the remove icon.
User Segments and Promotions
Once a user segment has been saved and generated, it can be used by other features of Aurora. For example, a basket promotion could be created that will only apply to the baskets of users that belong to specific segments. This allows you to target specific promotions to specific subsets of users.
1. To limit the use of a basket promotion to a segment of users, first edit the respective basket promotion that you would like to assign a segment to.
2. In the Conditions section of the basket promotion, a dropdown menu can be found, through which you can search for and select multiple user segments:
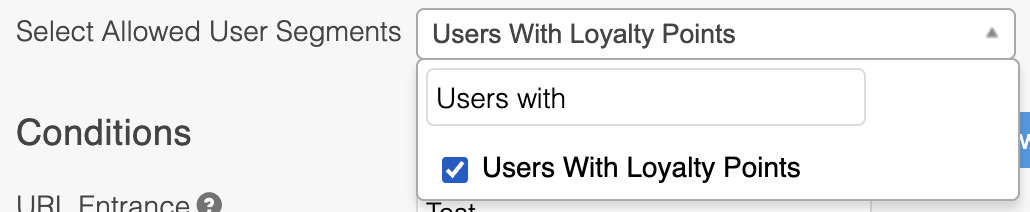
3. Once you have selected the relevant segments that you would like to limit the basket promotion to, save your changes. The basket promotion will immediately be limited to users of the selected segments.
Updated 4 months ago