
Creating Price Promotions
A Price Promotion is a simple promotion which, when applied to a subset of products, reduces their price by a specified amount.
This article walks you through setting a price promotion up.
Creating a Price Promotion
To create a price promotion:
1. Navigate to Merchandising > Price Promotions and click the Add New Price Promotion tab.
2. Specify if you would like the promotion to be active by checking the Active check box.
3. Enter a Promotion Name.
4. Choose which type of Promotion you would like to create and enter the discount amount:
- Reduced Amount
- Percent Reduction

5. Enter any text or HTML that you would like to appear on your store when a product meets the conditions set for the price promotion. This can be set separately for the Product Listing Page and Product Details Page. You could provide:
- a string of text
- the location of an image
- an extract of HTML
Your stores front-end templates will determine how this information is displayed. Your Digital Agency will be able to customise these to meet your requirements, please contact them for further information.

You are now ready to specify which products should qualify for the price promotion.
Qualifying Products
To apply your price promotion to a list of products, you create a set of rules which first define the list.
These rules are dynamic - taking up to date product values into account. The rules could be as simple as "all products within a specified category" or "products above a certain price, with a stock level above a certain amount and with a product reference that begins with a certain letter".
As well as using standard product fields like Price and Stock, you can also use your custom defined product fields as a basis from which to create rules.
1. To add a new rule, select the first  icon.
icon.
You can delete a rule at any time using the Delete icon.
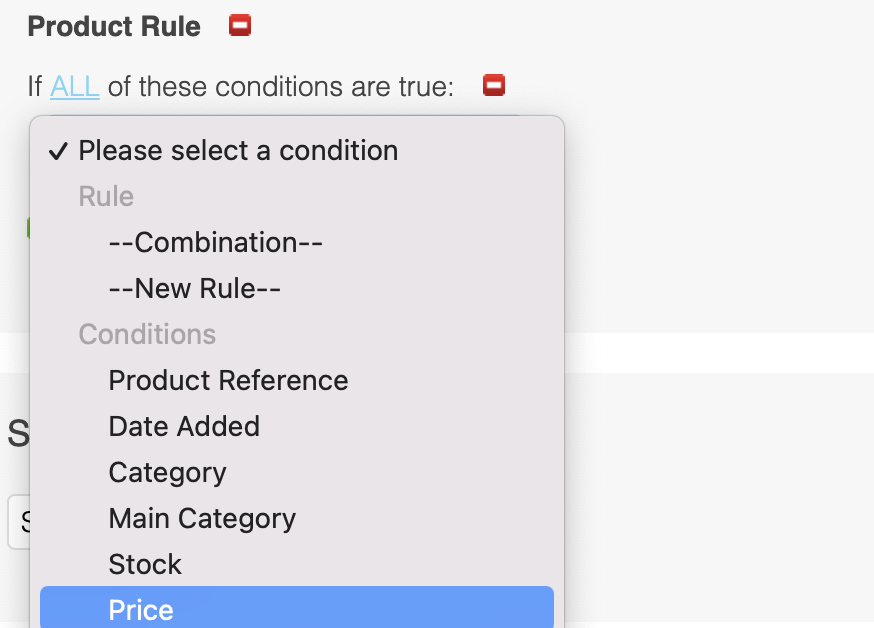
2. Select the field which you would like to use as a basis for the rule from the Please select a condition drop down menu:
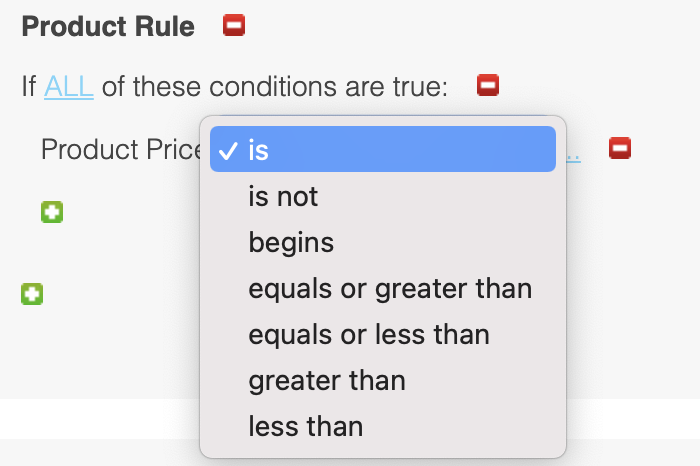
3. To select the operator for a rule, click on is, and select an operator from the subsequent drop down menu:
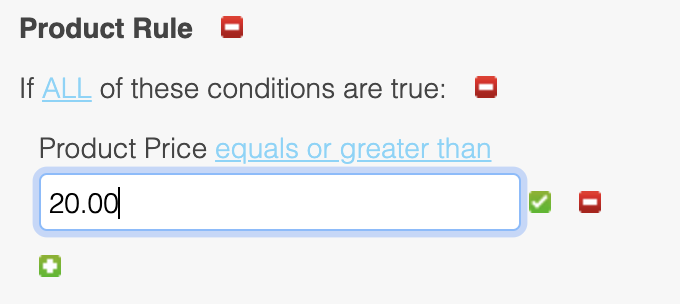
4. Enter the value that you would like the rule to evaluate against in the last field.
5. To save the rule, use the  icon. Your rule should look like the below:
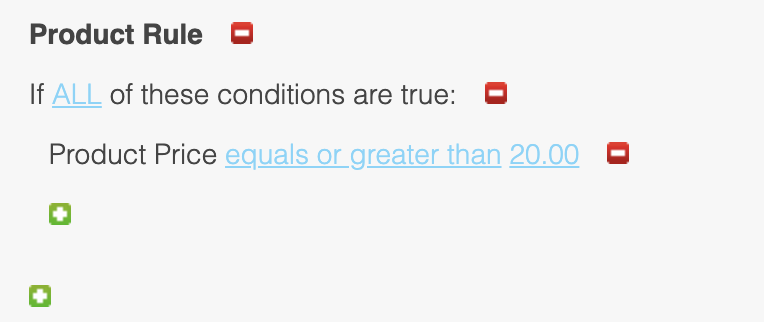
Once a rule has been saved, it can be edited by clicking on any of the elements that are highlighted.A rule can be deleted using the Delete icon.
You can add additional rules by repeating steps 1-5.
Use the parent operators ALL and ANY to combine rules and create your own unique set of products, to which you can apply the promotion. You can also nest rules to further refine this list of products.
When creating a set of rules, you can use the preview button to view a list of products that match your current criteria.The preview will appear towards the bottom of the Price Promotion page. As you add further rules, you can refresh the preview to see what effect each rule is having on the list of products.
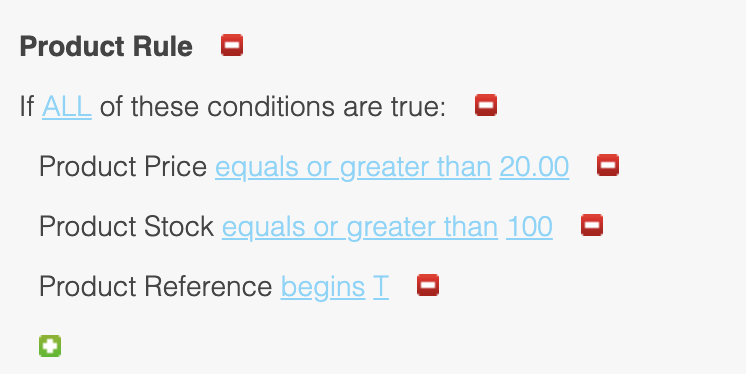
The example below shows a set of rules that filter for products that meet ALL of the below criteria:
- Price is £20 or higher
- Stock level is 100 or higher
- Product reference begins with the letter "T"
Scheduling A Promotion
A start date and end date are required for the content to be accessible within the Product Listings Page and Product Details Page. This is useful for promotions that begin and/or end at unsociable hours.
It will then need to be set to active for it to be automatically enabled, once saved.
To schedule a promotion:
1. Under the Schedule heading select the  icon.
icon.
2. Upon clicking in the Start Promotion field, a date selector will appear. You can use this to select the date and time you would like the promotion to start from.
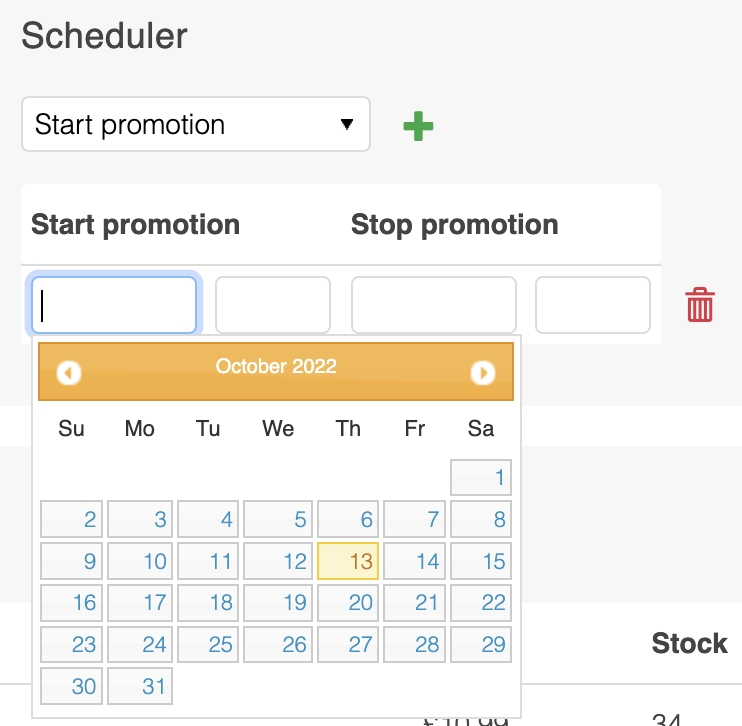
3. Click in the Stop Promotion field to select the date and time you would like the promotion to stop.
You can schedule further instances of a promotion by selecting the icon and following steps 2 and 3.
To delete a scheduled instance of the promotion, select the Delete icon.
Updated 4 months ago