
Dashboard Reports
You can save specific Dashboard date ranges, comparisons and layouts for later use as Reports.
This article helps you create, amend and delete Reports.
Reports
You can save specific Dashboard date ranges, comparisons and layouts as "Reports" which can be referred to at a later date. You can also set a Report as the default view to display each time you log into Aurora.
Creating Reports
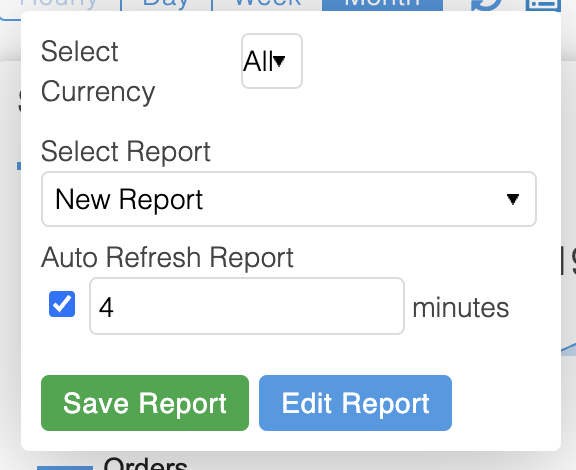
Once you have configured the Dashboard to meet a specific requirement, save that configuration as a Report by clicking the Report icon located to the top left of the page.

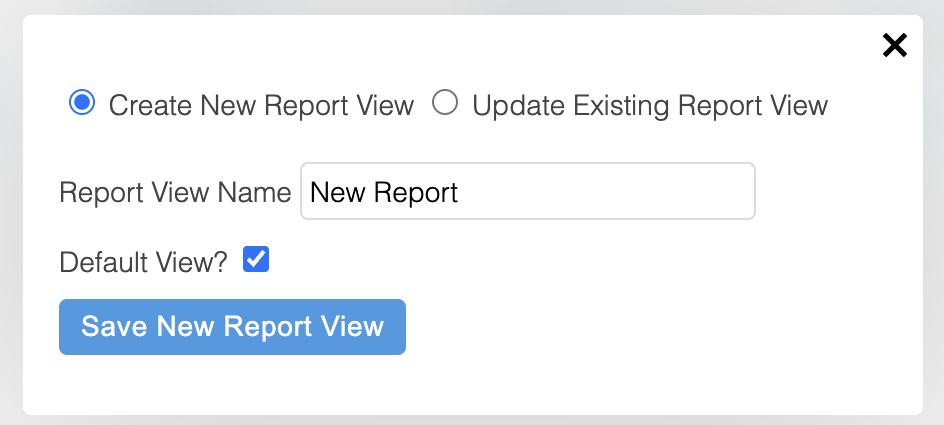
From the report menu, select the Save Report button under the Select Report heading.
From the resulting menu, ensure the Create New Report View option is selected. From here you can title your Report and optionally set it as the Default View each time you log into Aurora.
Save your changes using the Save New Report View button.
Updating Reports
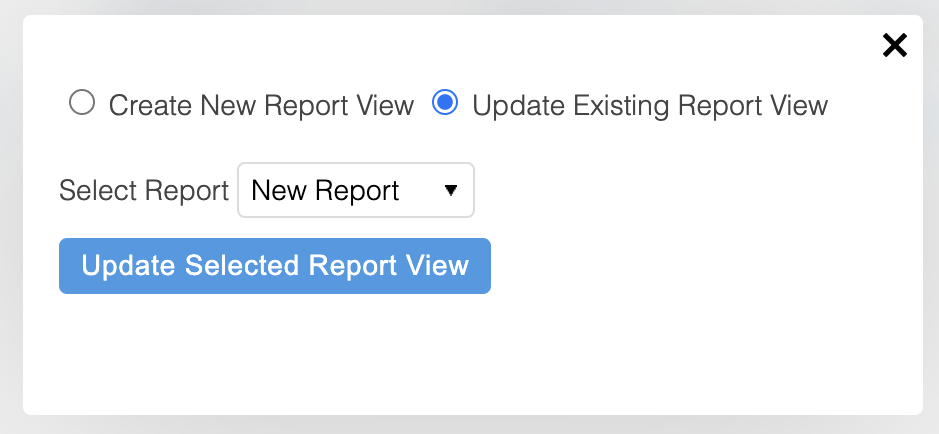
If you've altered an existing Report and would like to save those changes, using the above menu, select the Update Existing Report View option.
Select the report you would like to overwrite from the Select Report drop down menu, and save your changes using the Update Selected Report View button.
View Existing Reports
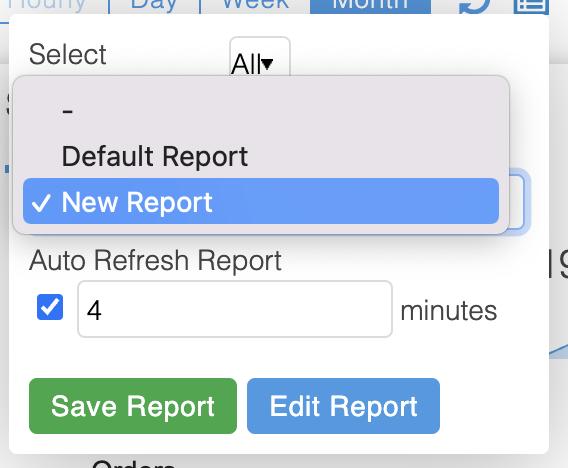
From the report menu, you can view a list of the Reports available using the Select Report drop down menu.
You can select a report to view from this list. Charts automatically update once you have made your selection.
Deleting Reports
You can delete an existing report using the Edit Report menu under the Select Report heading on the Report menu.
On the Edit Report menu, use the Delete icon to delete a Report.

You can also change the Default Report that displays when you log into Aurora by selecting the relevant Default option.
Auto Refresh
If you keep the Dashboard open and refer to it often, you could enable the auto-refresh option. This will automatically refresh the data used by the Dashboard, at a frequency determined by you.
To enable the auto-refresh option, first click on the Report icon located to the top left of the page.
Then check the Auto Refresh Report checkbox.
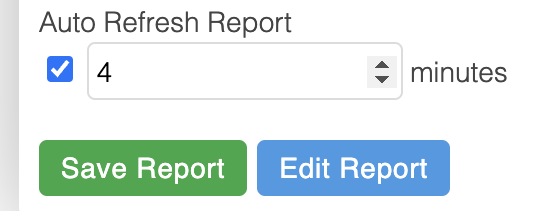
You can use the up and down arrows to increase or decrease the period of time between Dashboard refreshes.
When the Auto Refresh Report option is enabled, your current Aurora user account will not "time out" due to inactivity.
Updated 3 months ago