
A/B Testing using Merchandising Rules
A/B Testing is a term used to describe the process of testing different configurations on your Store to see which performs better. This in Aurora can be achieved using Merchandising Rules and its Action Groups.
This article loosely describes what A/B Testing is and how to implement it in Aurora using the Merchandising Rules system.
Introduction
A/B Testing is a very broad subject and this article does not aim to describe what this is generally speaking, but in short, this term is used to describe the process of testing different configurations on your Store to see which performs better. In Aurora this can be achieved using Merchandising Rules and its Action Groups.
What is involved in getting A/B Testing working in Aurora?
Getting A/B Testing running in Aurora is as simple as follows:
- Creating your Merchandising Rules and configuring your Action Groups for A/B Testing.
- Adding your tracking code to the Aurora Front-end Templates to allow you to see the results of you tests.
... that's it.
These steps are describe in more detail in this article, but there is very little required for you to begin to start running your own tests and finding out what impact your Merchandising truly has on your conversion rates.
Why would you use A/B Testing?
You might do this to test which:
- Blend has the best conversion performance.
- Header content performs the best for your landing pages.
- A great many more things...
How to Enable A/B Testing
1. Configure the Merchandising Rules
A/B Testing is a feature enabled from the Aurora Back-end under Merchandising > Merchandising Rules > Edit.
For more information on Merchandising Rules and how to use them more generally, please see the Merchandising Rules support Article.
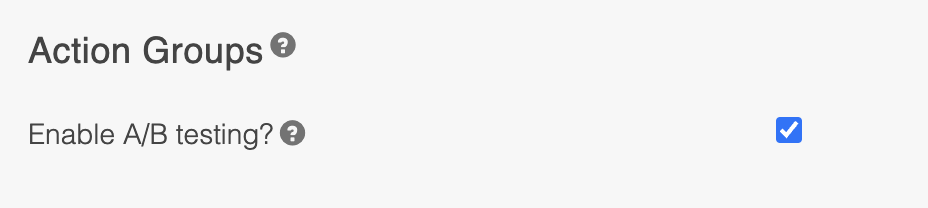
To enable it, simply edit or create a Merchandising Rule and tick the Enable A/B Testing? option, shown below.
This will present you with additional Action Group options, the ability to add extra Action Groups and even assign each group a probability of being applied to the Front-end.
The additional options include:
- Minimise/Maximise Action Groups
- Add Action Group
- Remove Action Group
The screenshot below shows a single Action Group configured with a 50% chance of being applied.

When using A/B Testing, the above will appear once for each Action Group you would like to test, from a minimum of 2 to a maximum of 10 (to revert back to a single action group that is always applied, you must untick the Enable A/B Testing? option).
Minimise Action Groups
This button reduces the Action groups to their minimal details for the purposes of making it easier to balance their chances of being applied.
If you configure 3 Action Groups, it can be awkward to see what impact changing the chance of one group has on the other two groups. To help with this, you can minimise them to clearly see what the chance of each group is, and adjust them as you see fit.
When enabled, this feature will result in the following 'cut down' UI being displayed, allowing you to manage the chance of each Action Group being displayed more easily.

2. Update your tracking code(s)
Once you have your Merchandising Rules in place, your testing has begun, but you need a way to track the results before you can see any results. To do this you should set a Tracking Code for each of your Action Groups and then expose these on your Front-end to your chosen 3rd party tracking provider (e.g. Google Analytics) using the methods described in the Affiliate and Traffic Tracking Codes support Article.
This article does not discuss how to implement tracking with any one specific provider. Instead, it simply details how to access the information required in the Aurora Front-end Template, so that you can then use whatever 3rd Party Tracking provider you wish.
Updated 3 months ago