
Managing Lists
Product Lists can be managed and displayed in a multitude of ways.
This article covers the managing of product lists.
Overview
Product Lists are constructed from one or more filters.
If a product list has only one filter assigned to it, all of the products from that filter will be displayed in the product list (taking any specified limits into account). If a product list has several filters assigned to it, products will be taken from the first filter, followed by the second and third filters, until the product list limit is met.
The order of products can be specified on a per filter basis - but this can also be overridden by the product list order - if it is provided.
For best results, assign several filters to a product list and limit the total number of products using the product list limit.
Product List Generation
To improve the performance of your store, product lists are cached. This cache needs to be generated after the creation or editing of a list. The Update Frequency of a list determines how often the product list cache is generated.
The update frequency of Generic lists can be chosen when editing the product list. Generation of Generic product lists can also be forced at any time by using the Generate List button on the Edit product list page.
The update frequency of Up Sell, Cross Sell and Related product lists is set at once a day, this occurs overnight and can not be overridden.
What happens if I activate a product list that had previously been deactivated?Once a product list has been activated, its cache must be generated before it can be used. The product list will be put in the generator stack, and its cache will be created once the generator finishes its processes, and this also depends on the Update Frequency specified.
Managing Product Lists
The Product Lists page is found in Aurora by navigating to Merchandising > Product Lists > Product Lists.
Here you will find a list of all created product lists.

Product lists can be managed in a similar fashion to other items in Aurora.
| Item | Description |
|---|---|
| Name | Contains the name of the product list. |
| Type | Contains the type of product list. There are four different types:
|
| Description | Contains a description of the product list for internal use. |
| Last Generated | Contains the date and time that the product list was last generated. |
| Created | Contains the date and time the product list was originally created. |
| Modified | Contains the date and time the product list was last modified. |
| * Generation Status | Provides the generation status of a list:
|
| * Status | Use the status icon to enable or disable a product list. If a product list is disabled, it will not display in your store. |
| * Edit | Edits the relevant product list. |
| * Delete | Deletes the relevant product list. |
| * Add | Creates a new product list that can then be customised. |
The next article in the series discusses the Creation and Editing of Product Lists.
Using Product Lists
Product lists can be used virtually anywhere in your store via a Smarty function or by AJAX/JSON. The use of product lists in the front-end of your store is discussed in more detail in the Product List Front-End Guide. You can also assign a product list:
- To a product category.
- To a filter of a product field (sidebar).
Categories
To assign a product list to a category:
-
Navigate to Products > Categories and select the category you would like to assign the product list to.
-
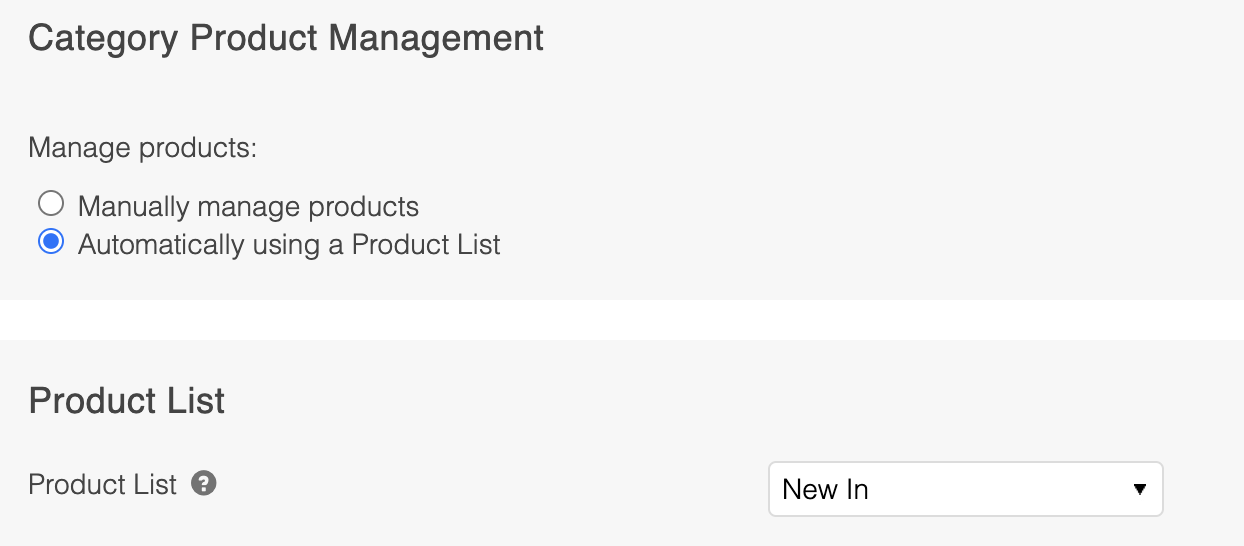
Expand the Products menu, and enable the Automatically using a Product List option.
-
Select the product list from the drop down menu that you would like to assign to the category.
- Click the Save Category button to save your changes.
The product list that is assigned to the category will need to be regenerated before its products will display in the category.
Filters
To assign a product list to a field/filter:
-
Navigate to Products > Fields and edit the field/filter item you would like to assign the product list to.
-
Select the product list from the drop down menu that you would like to add as a filter item.
-
Enter the name/description that you would like the product list to display as on the sidebar into the Field Value field.
This entry will be added as a value for the respective field for all products on the selected product list. Aurora sidebars will then filter by this value to display all matching items in the sidebar.

4. Click the Edit Field button to save your changes.
The product list that is assigned to the field will need to be regenerated before its products will display in the sidebar.
Updated 4 months ago