
DPD Interlink
This support article describes what the DPD Interlink integration does, as well as how it can be set-up and managed.
Introduction
The DPD Interlink integration allows customers to have their orders delivered to 3rd party collection points from a range of services (as supported by DPD) and integrates with the Aurora Store Locator to simplify selection of your desired Collection Point.
The system integrates with the Aurora Store Locator to provide a searchable (by Post Code and Name) Google Maps interface, with clickable results for ease of use when trying to find the best location to have your goods delivered for collection.
Configuring DPD Interlink for the First Time
Aurora Back-end
DPD Interlink Integration Settings
The DPD Interlink integration settings can be accessed in the Aurora Backend under Store > Settings > Shipping > DPD. This contains all the DPD Interlink settings for you to configure:
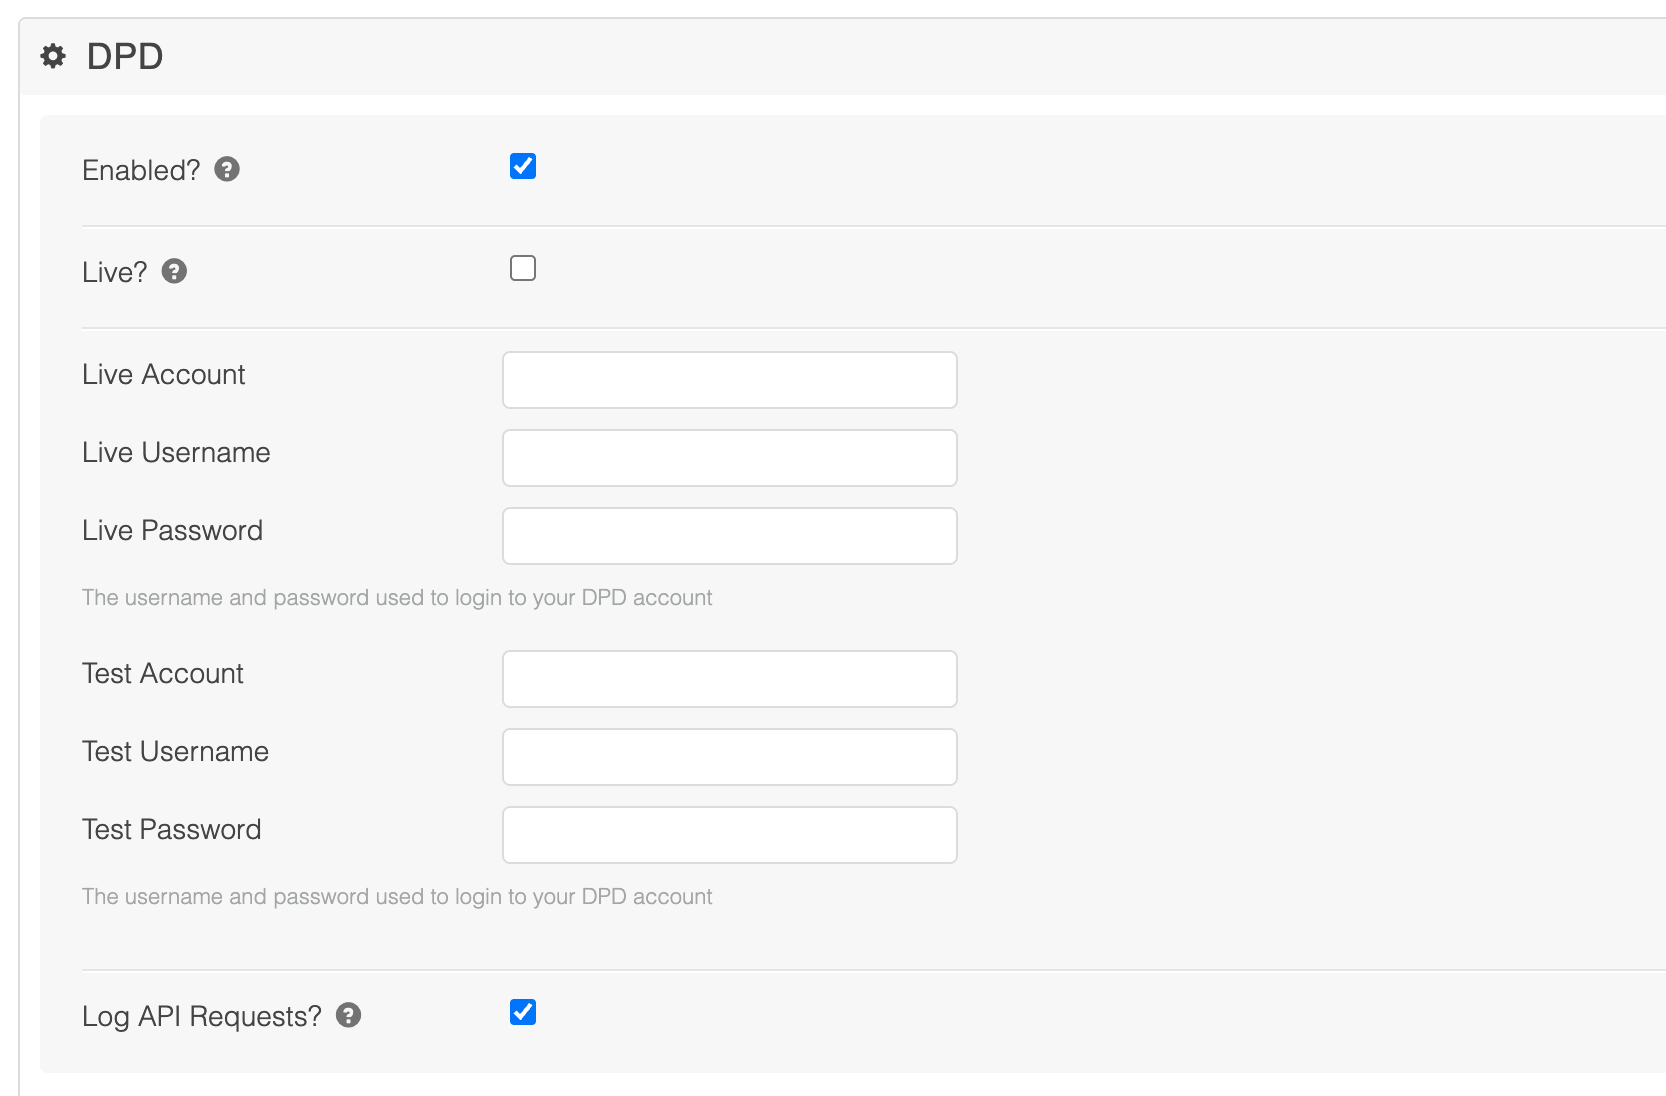
By setting these up correctly, following the 3rd Party Collection Point integration guide and leasing with DPD directly you should be able to enabled the service in Aurora without any additional assistance from Aurora Commerce.
If you do however have any questions, please contact your Agency for assistance.
| Setting | Description |
|---|---|
| Enabled? | Enables or disables the DPD Interlink integration. |
| Live? | Switches between Live and Test integration modes |
| Live Account | API account ID for live integration mode |
| Live Username | API username for live integration mode |
| Live Password | API password for live integration mode |
| Test API key | API account ID for test integration mode |
| Test Username | API username for test integration mode |
| Test Password | API password for test integration mode |
| Log API Requests? | When active, all requests to the DPD Interlink API will be logged to the Aurora Integration Log for your reference. |
Shipping rules
When using the DPD Interlink service, you will need to configure a shipping rule for your DPD Collection points to use. Please use the Shipping Rules support article to find out how to configure these rules and note that you will need to select DPD Collection as the Delivery Type when configuring shipping rules for DPD Interlink following the guide.
If you do not configure a rule as described here, then your DPD Collection Points will not work and may not even appear in the Store Locator.
Shipping Method
The individual shipping method might be configured as follows.

Points of particular interest include:
- The "Delivery Type" should be set to "DPD Collection".
- The "Default Courier" should be configured to use the DPD Service you are making use of.
For a little insight into how Aurora matches a visitor's selected DPD Collection Point to an Aurora Shipping Rule/Method, please see the following very brief description of the decision making process aurora follows.
After a visitor to your Store selects a DPD Interlink collection point from the Store Locator, Aurora will find a shipping rule following these rules:
- Find a shipping rule matching the selected DPD Interlink collection point Carrier Code and Country:
- FAILURE: If no rules are found, Aurora will use a fallback shipping rule for DPD Interlink and will place the order as per normal, but will raise an error on the order using the Error Logs to flag the issue of you to address manually.
- SUCCESS: If one or more rules are found Aurora will refine them by the Service Code provided (by DPD) with the selected DPD Interlink collection point.
- SUCCESS: If a rule matching Service Code is found, it will be used.
- FAILURE: If no rule is found Aurora will check in the remaining rules for any that have a blank Service Code:
- SUCCESS: If a rule with a blank Service Code is found, it will be used.
- FAILURE: If no rules are found, Aurora will use a fallback shipping rule for DPD Interlink and will place the order as per normal, but will raise an error on the order using the Error Logs to flag the issue of you to address manually.
The above is provided simply to give a little insight into how the DPD Shipping Rules and Couriers should be configured.
The Front-end Store Locator
When the DPD Interlink integration is enabled and configured, the frontend store locator https://demo.auroracommerce.com/google/store-locator will include DPD Interlink collection points.
By default (if your Store is using the Front-end Template from the Aurora Demo Example Templates) a new option called "Collection Service" will be displayed next to available fascia filters, which will allow customers to choose if DPD Interlink collection points should be displayed in the search results or not:
.png")
The "Collection Service" check box will be available only if the Fascia Functionality is enabled. See the Store Finder with Combined Fascia Results support article for information on how to enable it.
If Fascia Functionality is disabled, DPD Interlink will be included by default if DPD Interlink is enabled.
Physical Store Preference
A typical store list will include physical stores and DPD Interlink collection points - which will be ordered by distance. The exception to this is when a physical store is within a configured radius: in that case a physical store will take precedence over any DPD Interlink collection points, and will be added to the beginning of the stores list. The radius that determines this can be configured in Aurora Backend under Store > Settings > Shipping section. The setting is called Prefer Physical Stores instead of Collection Points when they are within (miles) and accepts a positive number.
The Front-end Checkout & Basket
Once the configuration described in the Configuring DPD Interlink for the First Time > Aurora Back-end section of this article is complete, the basket and checkout pages will allow you to select DPD Interlink collection points if you are using the Front-end Templates provided by the Aurora Demo Example Front-end Templates.
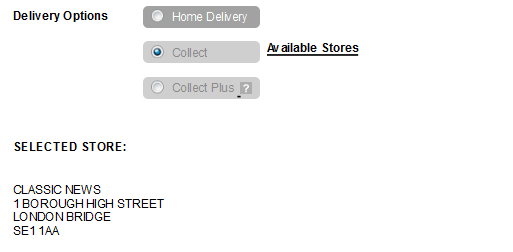
DPD Interlink collection points will be selectable the same way as a physical store, which can be done following these steps:
- Select the Collect delivery option
- Click Available stores, which should open up the Store Locator in a popup
- In the pop up store finder, select a physical store or a DPD Interlink collection point by clicking the appropriate Choose store for delivery link.
Once you have selected a Store or Collection point, it details will be displayed on the Basket and Checkout. For example:
All of the above describes the default behaviour provided by the Aurora Demo Example Front-end Templates. Your Store will likely not be using these templates and so you may need to contact your Agency to get these behaviours enabled on your Store's Front-end.
This user journey is provided for illustrative purposes only.
Error Handling
There are a few locations at which errors can occur during the order placement process, from shipping method selection in the basket to order placement itself, if things go wrong Aurora will do all it can to avoid interrupting the potential customer's progression to conversion.
If the DPD service cannot be contacted, or an error occurs during the store locator's requests to DPD, the DPD collection points will not be included in the search results and an error message can be displayed to suggest the visitor should perhaps select another Branded Store or try again later:

The store locator popup, accessible from the basket and checkout pages, will display errors the same way as the store locator page and all of these errors are customisable through the Aurora Site Text system.
Service Errors
If the DPD Interlink service can't be connected to or a request simply fails, an error will be logged to the Error Log, which can be accessed in Aurora Backend under Store > Logs > Error Logs.
Updated 4 months ago